Showing posts with label Fabric Craft. Show all posts

Wednesday, June 25, 2014

Finished UFO: A Quilt for Sophie's Sister

Two weeks ago, I did a little post about my lost and found UFO's.  I gave myself until the end of June, a sort of random deadline, to finish these UFO's. This is my first completely finished UFO.  A super special friend is coming to visit me next week before she flies South to be with her daughter when she has her second child.  This quilt is for her new granddaughter.  

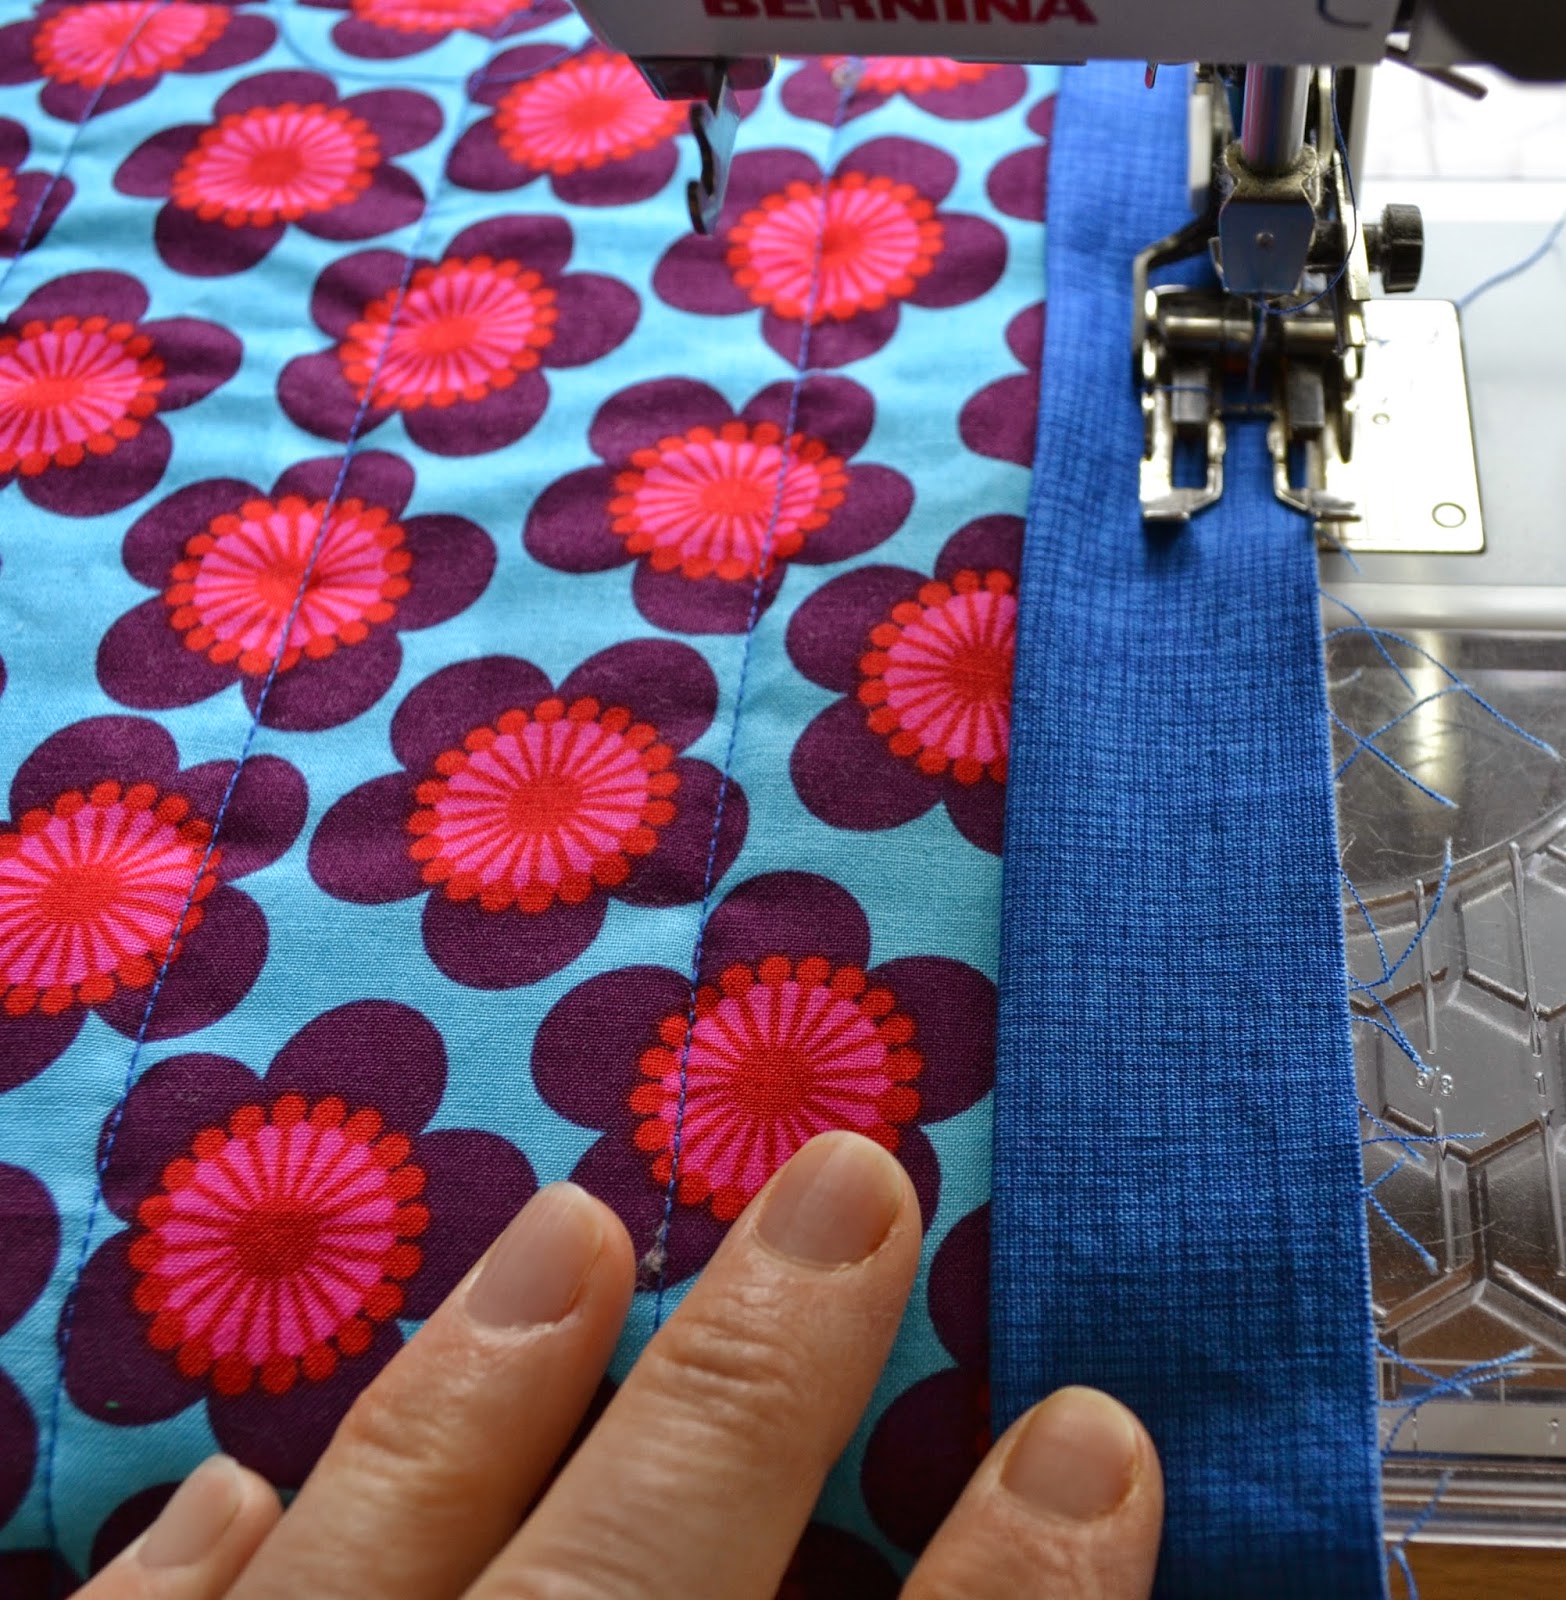
I absolutely LOVE to make quilt tops.  I don't love quilting however.  I always think I am going to try a fun quilt pattern but end up stippling.  I stipple because it's quick and forgiving.  I use a BSR on my Bernina 430 to do free motion quilting.  While quilting this piece, I struggled with skipped stitches.  After cursing my BSR and changing my needle to a new needle and changing the bobbin thread, I did a Google search to help me solve the problem.  After reading lots of advice in many different posts, I went back to my to machine test some theories.  I changed my quilting needle to an 90/14.  The larger needle doesn't move away from the bobbin hook.  I also changed my bobbin thread to a lighter weight thread.  It was like magic.  I had changed my needle and thread in an attempt to stop the skipping but I had not changed to the right needle and thread.  If you have trouble with skipping stitches, this might work for you too.


 I actually completed both of the quilts.  I sell quilt tops HERE.  I love to make tops but really don't love to quilt.  If you love to quilt, or need a quilt and have a favorite long-arm quilter, this might be just the thing for you. Both quilts have lovely '30's reproduction fabrics and two different white on white fabrics.  There is a white on white rose print and a white on white swirl print.


Linking To These Wonderful Parties:

Thursday, June 12, 2014

Lost and Found UFO's


I was looking for some fabric to make a quilt and in my digging for just the right fabrics, I found a forgotten project box with a few unfinished projects.  I pulled the forgotten projects out and decided it was time to finish them.
This is the remainder of a Layer Cake I used to make a different quilt.  I vaguely remember making these blocks with the leftovers when the other quilt was done.  I got to work, sewing these blocks onto a quilt top.  After I was finished, I remembered that there was a particular way to sew these blocks into rows and I hadn't done it right.  Oh well, I liked this way.
The top little small so I found a few pieces of fabric that would work borders and then I went to the fabric store where I had purchased the Layer Cake and they actually had some yardage left.  
This was the second UFO in the box.  The entire piece was done and I had enough blocks to make one more row so I sewed them together and made a small lap top.  I will need to put a border on this.
The hidden box also contained this stack of blocks.

And these left over blocks from my Tulip Quilt.  I think they will make a fun Spring table runner.  If I finish it now, it will be ready next Spring.  My goal is to finish these projects by the end of June....


Thursday, May 1, 2014

Quilted Placemat Tutorial


For 6 Placemats You Will Need:
3/4 yards for the main part of the placemat (main fabric)
1/4 yard for the side of the placemat (side fabric)
1/8 yard for the accent piece (accent fabric)

1 yard for the back of the placemats
1 yard of batting
1 yard for the binding
I always wash my placemat fabric before making the mats to preshrink the fabric.  If you use cotton batting, wash that too.  If you use polyester batting, you don’t have to prewash it.

Placemats add character and charm to your table every day.  In addition they are great table protectors.  I like to have lots and lots of placemats for every occasion.  They are easy and fun to make.


Step 1
Cutting
From the 'main fabric,' cut 6 rectangles that measure 12-1/2" by 13"
From the 1/4 yard of 'side fabric,' cut 6 rectangles that measure 4-1/4" by 12-1/2".
From the 1/8 yard of 'accent fabric,' cut 6 rectangles that measure 2-1/2" by 12-1/2". (You can make these thinner if you want a thinner accent strip, for example 1" by 12-1/2" will make an accent that adds just a little bit of accent color.)

Step 2

Fold your accent pieces in half, with right sides together.  Press.  Place on the right side of each of the 4” X 12-1/2” rectangles as shown.  Line up the raw edges.  Stitch in place.


You can chain piece this step.

Step 3

Lay this finished pieces on top of the placemat main fabric (12-1/2” by 13”) with right sides together, matching the edges.  Stitch together as shown.


 Again, you can chain piece these.

Press the seam toward the side fabric.

Step 4  
Make a ‘fabric sandwich’ with your backing fabric, your batting and your placemat.

Step 5
Quilt your placemat anyway you desire.  I use my walking stitch and make straight lines. To quilt your placemats like I did, first 'stitch in the ditch' along the seam that connects the accent fabric to the side fabric.  Second, find the middle of the matt and mark the line.

Next, quilt a line using your walking foot. With your seam guide attachment, Use previously quilted line to guide your next line.

Step 6
Trim your placemats, using your rotary cutter and ruler.

Step 7
Bind your placemats using the tutorial on my Run’n Stitch Blog HERE

These pictures provide a little reminder if you don't need a detailed tutorial.  The key to making these placemats is !!!SEW THE BINDING TO THE WRONG SIDE OF THE PLACEMAT!!!


Step 8
Finishing
Press your binding away from the back of your placemat.
 Pin your binding to the other side of the placemat.  Pin it just a smidge over the stitch line.

Fold your corners so they have a nice point.


 Pin in place at the corners.
 On my sewing machine, I move my needle to the right a couple clicks so I can line the center line of my sewing foot with the fold of the fabric and the needle sews just to the right of center.  This way I can sew a straight line and catch the binding fabric on the other side of the placemat.

The front
The back


Find fabrics for this project in my Run 'n Stitch Shop HERE