Saturday, October 1, 2016

3 Reasons to Finish UFO's

After a few years hiatus, I have returned to quilting in earnest.  I found this incredible link called One Monthly Goal-OMG, which has motivated me to dig into my UFO pile, which is filled with very old projects.  I have just completed my first OMG project and have learned a couple of lessons about UFO's along the way.
My one recommendation is to have a time limit for finishing a UFO-is it possible?  Here are 3 reasons you should consider this challenge.

1.  You may not be able to find the pattern for your project.  When I pulled this quilt out, I found that I didn't have the pattern.  Luckily I had put one of the blocks together so I could figure the pattern out.  It would have been a shame to throw away all of those neatly cut little pieces.

2.  You may not like the quilt or pattern when you decide to finish it.  Styles and colors change.  Something that was trendy and interesting 4 or 5 years ago may seem dated and uninteresting when you dig it out of your UFO pile.

3.  You may not be able to find fabrics you need to finish your quilt.  As we all know, fabrics go out of print and you may find yourself in a pickle when you are just short of the amount needed for the finish.

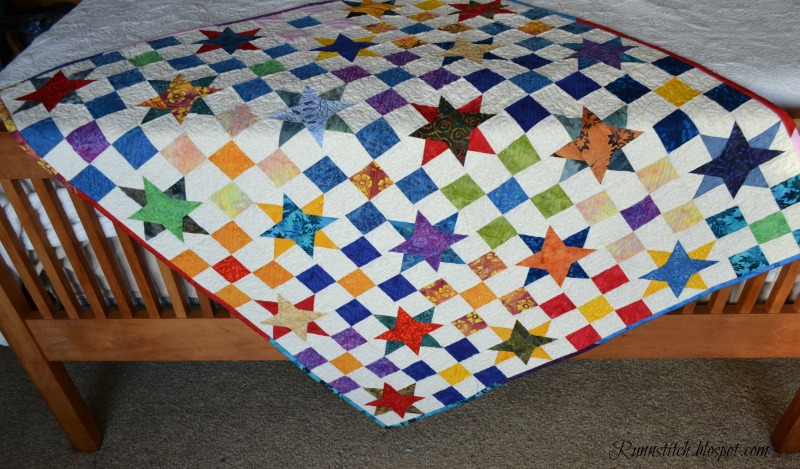
All three of these things happened with this quilt.  I was able to cobble together a small quilt from the fabrics that were cut out.  The fabrics are old enough to be out of print and the colors are a little dated too.  Luckily I LOVE anything blue so I can live with the colors.  The ideal binding would have been the pansy fabric but I didn't have enough.  I auditioned many different fabrics for the binding and this was the best I could do.  I don't love it but it works.


I am very happy to have this quilt finished.  I love the quilt pattern.  I love the blue.   The main thing is that it's done.  On to my next OMG project!

Linking to: OMG, MCM, Monday Making, Moving it Forward Monday, Linky Tuesday,Midweek Makers, Let's Bee Social, NTT Blog Archives, Finished or Not Friday, Finish it Up Friday, Can I Get A Whoop Whoop,


Monday, September 26, 2016

Jelly Roll Quilt Tutorial

Two things happened yesterday....I finished my Cherry Fizz quilt top and we had our first snow of the season, termination dust.  


Last week I wrote a post about a mistake block I made.  I made a quilt top using this block and I put together a little tutorial.   Please note that this pattern has been tested by me only.  I wrote the notes as I was putting this together.  If you find a mistake, please let me know.


A full jelly roll will give you 84 blocks so you could make a quilt that is 12 rows with 7 blocks in each row which would measure 56" wide by 96" long without borders.  If you make two equal sized quilts, you can make a quilt that has 7 rows with 6 blocks in each row, which will measure 48" by 56" without borders.  I decided to make two quilts with this jelly roll because I didn't like the way all of the fabrics in this jelly roll looked in this quilt.  I also really like to make lap quilts.

If you want to make this quilt, this is what you need for one quilt that measures 56" X 96":  1 Jelly Roll and 3 yards of background fabric-for a quilt without borders.  If you want to put borders on the quilt, add the amount you need for the border to your materials.

Cutting:  
     Cut each of your jelly roll strips into (4) 6.5" rectangles and (4) 2.5" squares.
     Cut your background fabric into (11) 2.5" strips and (11) 6.5" strips. 

Sewing:
Sew all of your 2.5" jelly roll squares to your 6.5" background strips and all of your 6.5" rectangles to your 2.5" background strips.

Press the seam toward the jelly roll fabrics.


Cut each of your strips into 2.5" X 8.5" strips as shown.

You will have 168 sets of 8.5 inch strips.

Sew all of these strips together to make a 4.5" X 8.5" rectangle as shown. Be sure the background 2.5" square is on the top of the strip and sew on the right side of the strip. 

You will have a  sets that look like this.  

Sew two sets together to make a block.  Here are a couple of ideas for how to sew the sets together.  


Press all of the seams in one direction.  It doesn't matter which direction.

When you sew your blocks together, you can turn your block whichever way the seams from each set of blocks butt together.    

 This is what I have left from this Jelly Roll.  I have another block in mind.  Stay tuned.

You can purchase this quilt flimsy from my Etsy shop.

Find fabrics for this quilt in my Run 'n Stitch Shop HERE


Sunday, September 18, 2016

Jelly Roll Fun

I am working on my first OMG challenge.  It's a challenge for me because I have to get the thing done.  Find the quilt HERE.  After putting together all of the blocks, this is what I had left.  There isn't enough to make another row, so I guess it's time to put a border on the thing.  I don't have a lot to work with, but let's see what I can do.


I played with these fabrics and was able to put together a little border and am ready to start quilting.  

I was digging in the dark corners of my fabric stash, looking for just the right fabric for a backing for the pansy quilt, when I found this sweet little jelly roll.

I haven't made a jelly roll quilt for a long time and I wanted to cut it up right away and start sewing but I wasn't quilt sure what to make.  I was browsing my favorite quilt blogs to get an idea and came across Katy Quilts post, Finish It Up Friday-Twist and thought, "That's what I want to do!"  

I cut some strips and started sewing, because that's how I do things-no pesky paper and pencil for planning.  Sometimes things even turn out.  

When I sewed the block together I realized I hadn't quilt figured out how to make the block, which is usually the case.  I grabbed my seam ripper, but stopped.  I decided that I would just leave the block as it was and move forward.  I'm not sure what the finished quilt will look like but here goes.
Notice the sweet berry print on the white fabric.  It's perfect for this project.


Honestly, I've never seen a bad jelly roll pattern so whatever happens is good, right.

Saturday, September 10, 2016

Finish-Pixie Noel

     A few weeks ago I started a sweet little Christmas quilt using fabric from the Pixie Noel collection by Tasha Noel for Riley Blake, which I wrote about HERE.  It's always great to link a finish isn't it!


     Small quilts are wonderful for so many reasons.  They are relatively quick to make; you can try different quilt patterns and quilting patterns; you don't have to piece your backing; there's always a little person somewhere who would love a quilt.  I used a craft-size batting for this quilt.  I trimmed off the excess from the bottom (wheres the bottom on a square-right) and attached it to the side with a zig zag stitch.  
      The easy all-over quilt pattern is meant to give a feeling of a slightly windy day.  

 Aren't these little vignettes adorable!


You can find all of the fabrics I used to make this quilt HERE.  The yummy flannel backing is HERE.

Sunday, September 4, 2016

What? When Did I Make This?

I started my blog 3 years ago in October.  The challenge of learning how to operate the blogger program along with the fun of crafting and cooking and taking pictures of things I love kept me motivated for almost 2 years.  Then I stopped, almost cold turkey.  I'm not quite sure why, but maybe life just got in the way.  Last month, I decided to start blogging again but this time rather than 3 posts a week about all kinds of things, I am only posting once a week and all of my posts will be related to sewing.  For the past 5 weeks, this schedule has been manageable and fun.

The best thing about this posting strategy is that I am able to spend more time visiting quilt blogs and learning about the amazing things quilters are doing.  I recently stumbled on the blog, Red Letter Quilts.  Heidi's blog has a monthly link  One Monthly Goal (OMG) that inspires quilters to finish their projects by encouraging them to set a goal for the month and follow through.    She even offers a chance for a prize to people who meet their goals.

I thought I'd give OMG a try.  I pulled out my cob-web covered UFO tub; seriously, totally untouched for years, to look for a UFO to compete.  I did a little digging and pulled out this little bag of goodies.

When I looked at it, I could not remember ever working on this quilt project, I could not recall when I did it or what it was.  About 10 years ago I was developing mystery quilts for monthly classes and maybe this was one of the patterns I was working on; or  it could be that I saw a pattern and liked it and wanted to try it.  Since I put the time in to cut out all of the pieces, I thought it would be a good idea to put a little more time into it and finish the top.  I'm sure glad I did one block so I know what to do with all of these pieces because there is no pattern in the bag.


I have a good friend who loves pansies and her birthday is in May...is it possible?  Wish me luck.

Linking to: OMG, MCM, Monday Making, Handmade Monday, Sew Cute Tuesday, Linky Tuesday, Let's Bee Social, NTT, Midweek Makers, Finished or not Friday, Can I Get A Whoop Whoop, Show Off Saturday

Sunday, August 28, 2016

Quilt Finish

       Where does the time go?  Almost exactly a year ago, actually a little more than that, I published a post about the set up of my new John Flynn Quilt Frame, using this quilt as a sample.  Find the post HERE.  I FINALLY finished the quilt, binding and all.  I have to admit, I didn't complete the quilting on the frame.  I found it to be too cumbersome and limiting.  I was a little disappointed because it was a spendy item.  I probably won't use it again.  The frame is good, and may work well for some, but it's hard to teach an old dog new tricks.  Quilting is not my favorite thing to do anyway.  I am a 'get er done" quilter.  Stippling and straight row (walking foot) quilting are my friends.  Maybe I expected the John Flynn Frame to make me a better quilter.  I don't think it works that way anymore than buying more organizing supplies makes your space more organized.  Sigh....


SaveSave

Saturday, August 20, 2016

Winter Nights Fusible Appliqué Quilt

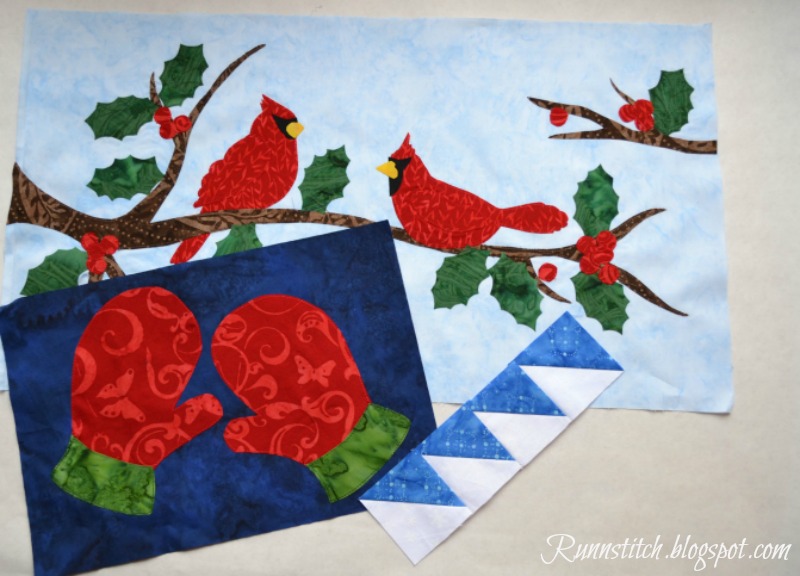
A friend gave me this pattern for Christmas last year and on a rainy, windy day this summer, I decided to start putting it together.  
 I LOVE fusible appliqué!  It's kind of like coloring in a coloring book in that it's calming and you get to choose the colors for the redi-made design.  You can find a tutorial for fusible appliqué  HERE.  
In addition, to the calming affects, fusible appliqué provides that feeling of instant gratification.

 The shiny, shimmery Fairy Frost adds the feeling of cold snow to the block.
This quilt pattern includes some pieced blocks and block borders to add a little variety to the project.  

The pieces for the quilt are large, which I also love because I like to topstitch around each piece to secure them.  The larger pieces are easier to stitch around.

These blocks are great time fillers.  I have a box with all of my blocks that have fusible pieces next to my sewing machine and if I have a few minutes between activities, I sew around a few pieces.    I'll put thread in the machine that matches the color of pieces in the blocks, and will sew around all of the pieces in all of the blocks that have that same color of thread in them. For example, I put silver metallic thread in my machine and sewed all of the silver metallic pieces in all of the blocks.  It took a few days as I just do it as a time filler.  I usually have several projects using fusible web, so all of those blocks are in the box as well. 

I think I will use these fabrics for my border.  
Linking to:  MCM, Handmade Mondays, Monday Making, Craftastic Monday, Moving it Forward Monday, Linky Tuesday, Too Cute Tuesday, Sew Cute Tuesday, Show and Tell, Midweek Makers, Wake Up Wednesday, Sew Fresh Quilts, NTT , Handmade Hangout, Can I Get A Whoop Whoop, Fabric Frenzy Friday,