I admit it... I just can't throw my scraps away. Knowing your problem is the first step to solving it, right? In addition to scraps of fabric, I have a bunch of fat quarters I collected back in the '90's when I didn't have time to sew. Of course they are still taking up a big chunk of space in my sewing room, space that could be used to store new, fun interesting fabrics. So, time to purge.
This is my tub of scraps. After I cut out a quilt or an apron or table runner, anything really, all of the scraps go in a big tub.... because I might need them for something later, right.
My tub is now full to over flowing and of course there are those pesky fat quarters that aren't even in this tub.
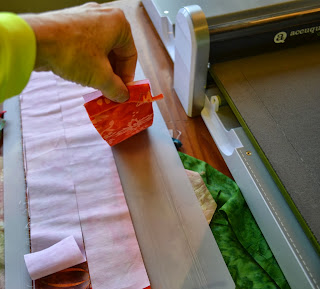
My husband bought me this wonderful tool for Christmas last year. It's called an Acuquilt. There are lots of cutting dies you can get to use with this contraption. It's really wonderful. The hardest thing about using it, is using it. After 30 years of rotary cutters and rulers, getting used to taking this out of the cupboard is just another habit I have to learn. I've been practicing this habit. The cutting die I will use for this project cuts 2-1/2" strips. Of course you can use your rotary cutter to make your strips but this is kind of fun and I think it's lots faster and more accurate. I also have a lot of fabric to cut, I'm in production mode.
The iron is on...everything that comes out of the tub has to be ironed before it's put on the cutter.
I put the little pieces on first to make sure I'm getting as much usable fabric out of each piece.
I stack the larger pieces on top of the small ones. I put about 4 or 5 layers of fabric on the cutting die.
Look...isn't this nice. A couple of cranks of the handle and I have perfect 2-1/2" strips.
And, a basket full of scraps I don't feel guilty about throwing away.
When I am done cutting, I put my scraps into bags according to their general color. So your saying, you had a big tub of scraps, now you have a bunch of little bags of scraps....hmmmm.
Stay with me, it really does get better;)
There are a million and one things that you can do with 2-1/2" strips, many more than what you can do with a big tub of random fabric.
One of my favorite things to do with random strips is to just sew them together and make a random sheet of fabric, a canvas. I have a general idea about what I'm going to do with my random canvas when I start sewing my strips together, usually, however the plan changes. That's my life.
For this project, I pull out blue, green and purple strips from those white bags. The only criteria for the strip is that it doesn't have flowers on it. I need light, medium and dark strips for this project. My initial idea had something to do with the ocean. So, blue, purple and green=ocean...
The first step in this project is to bring some order to my mess of strips. I need some sort of system before I begin. So, I sorted my strips into random piles. Believe me, these piles are random so no color theme, no length limit, and there is also a random number of strips in each pile. I set these piles in a row next to my sewing machine. It looks organized doesn't it.
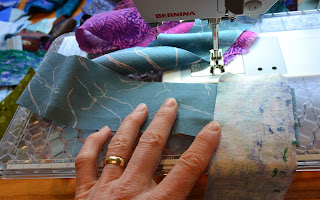
I will sew these strips together end to end. I want movement in the piece because I am thinking ocean, so I sew the ends together on the diagonal. I could just match the ends together and sew a 1/4" seam but for this canvas, movement is what I'm thinking.
To sew your strips together on the diagonal, you place one strip with right side up, long end away from the machine. Place the next strip face down with the long end toward your lap.
I have a center line on my sewing tray that I can use as a guide for a straight seam. I don't have to draw a diagonal line on each and every strip. You can draw a line, however, I would recommend practicing a straight line using a center line on your tray, you can make your own with a piece of colored tape.
Sew your two strips together with as straight a line as you can manage.
I just feed one strip in after the other chain piecing until all strips are sewn together end to end.
Here are my strips all sewn together. I once had random stacks of individual strips and now I have a random pile of sewn together strips. Doesn't this look like the initial picture of my tub of scraps.
I have a really long string of strips when I'm done. This really is a pile and you will have to straighten it out a little so you can cut the threads and stretch the long strip of strips out.
Now the hard part.... find the two ends of your really, super long strip. This is the part that takes the longest in the process. You need to cut off all of that excess fabric where your strips are sewn together. You also need to press all those little seams...aarrgg. Have a cup of coffee, take a break, put it away until tomorrow-no don't you might not pick it back up.
This strip was so long, and I wanted to keep the ends together so I started at the strip ends and worked my way to the middle cutting the seam excess along the way. I used my ruler to measure 1/4" from the seam and cut. You don't need to have a precise 1/4" seam for this, you can just whack the excess off with your scissors, but for me, order out of chaos and systems....right.
After the excess fabric is cut, press your seams, up or down, doesn't matter.
Now the fun begins.... This part starts slow, but goes pretty fast. Take both ends of your really, super long strip and match them, right sides together. You should follow the entire strip to the end to be sure it's not twisted, but for the first seam, I sometimes just sew and cut the twist off at the end. It depends upon how long the strip is.
Starting at the top, sew the two ends of the strip together, using a 1/4" seam.
This first seam is really long and it seems like you are sewing forever, but when your done, your super long strip is only half as long and it's two strips wide. Press your seam to one side.
The next step is exactly like the first step, bring the two ends of your long strip together. Now you have to make sure the strip isn't twisted.
Now, again, you will match the two ends, right sides together and sew another long seam down the side of the two strips. You have now turned your 2 strip wide strip into a 4 strip wide strip.
When you sew these strips together, you will have a closed end.
Move your long strip to your cutting table and cut this end off. Be sure to use the ruler to line up your cut to make this cut straight.
So, to recap the process.... you sewed a seam along the long side of your super long strip to make a really, really long two strip wide, strip. You matched the two ends of this two strip strip together and sewed another really long seam. You had to cut the end so you could open the strip into a pretty darn long 4 strip wide strip. Then you matched the two ends of this long strip together and you sewed a long seam and you cut the end and had an 8 strip wide sheet of fabric. Then, the final seam... you sewed the ends two 8 strip wide sheet together and cut the end
AND WOW
Here it is, your-well, whatever you want it to be. What will this be? This sheet of strips turned out bigger that I thought it would be. I have a feeling the end product is going to be much different than what my initial plan was.
Will I lay a pattern on this and make an apron?
Put a border on it and add sew large flowers cut from another piece of fabric to make a quilt?
Use 'Wonder Under' and some patterns and a border for a quilt?
Or use it for the back of a quilt.
If you look closely at these pieces, you will see that some have the ends sewn together using a 1/4" seam and some are sewn on the diagonal. Notice how random the fabric is. Can you find the criteria I used to select the fabric for the strips for each piece?
I don't know what I will do with this sheet of fabric yet but when I figure it out, I will post it. If you have an idea, I'd love to know it.


