1. When you sew your binding onto the quilt, start just below the middle of the side of the quilt. Make sure you have at least 12 inches of un-sewn binding at the start of your binding.
2. Sew the binding around the quilt using the standard method. Stop sewing 12 inches before the two ends join.
3. Open your binding and using a small ruler, make a 45 degree diagonal cut on one side of the binding strip
4. Lay your small cutting board on top of the quilt where you are cutting your binding strips. Put the the uncut binding strip on top of the board and then lay the cut strip on top of the uncut strip. using your small ruler, measure 1/2 inch from the top edge of the diagonal strip and mark the uncut strip.
5. Move the cut strip out of the way. Using the marking as a reference point, lay your small square on the uncut strip. Be sure your cutting the diagonal the right way. I've made this mistake.
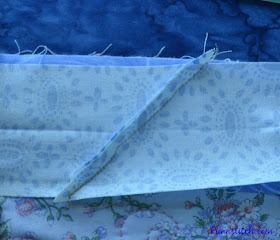
6. After your two sides are cut, sew your binding pieces together. Having a large opening helps with this step. Twelve inches is a bare minimum. I generally leave a much larger opening between the two ends of the binding.
8. Press the binding away from the quilt.
Linking to: Finished or Not Friday Can I Get A Whoop, Whoop, Show Off Saturday, Oh Scrap


Great tutorial. Thanks for sharing with Oh Scrap!
ReplyDeleteI think I've tried every possible way to join a binding! This is actually the way I've done most of mine, too.
ReplyDeleteIt's always interesting to see how other quilters do their binding. Thanks for sharing!
ReplyDelete